Creating a Manual Reconciliation
Manual reconciliations are an additional option for situations where:
An account isn’t automatically matched to a statement, or
You’re setting up historical periods for the first time.
Accounts that don't have a statement - like Payroll Liabilities
The reconciling account is not a bank account or credit card — for example, asset or liability categories like loans or equipment financing.
Before You Start
Auto-reconciled transactions Transactions from connected banks are marked as settled by default.
Manually created or CSV-uploaded transactions must be marked as reconciled within the reconciliation view.
Start a Manual Reconciliation
From the Reconciliations Dashboard, you can start a reconciliation in two ways:
Click + Start Reconciliation at the top of the screen. (Use this if you don’t see the account listed)
Click a month in the timeline, then select Start Manually
Start a Manual Reconciliation
From the Reconciliations Dashboard, you can start a reconciliation in two ways:
Click Start Reconciliation at the top of the screen. (Use this if you don’t see the account listed)

Click a month in the timeline, then select Start Manually
Then enter your reconciliation details:
Statement Date
Ending Balance
(Optional) Deposits/Withdrawals or Charges/Payments (for liability accounts)
3. When ready, click Build Reconciliation. Digits will generate your reconciliation view.

Reconciling a Category
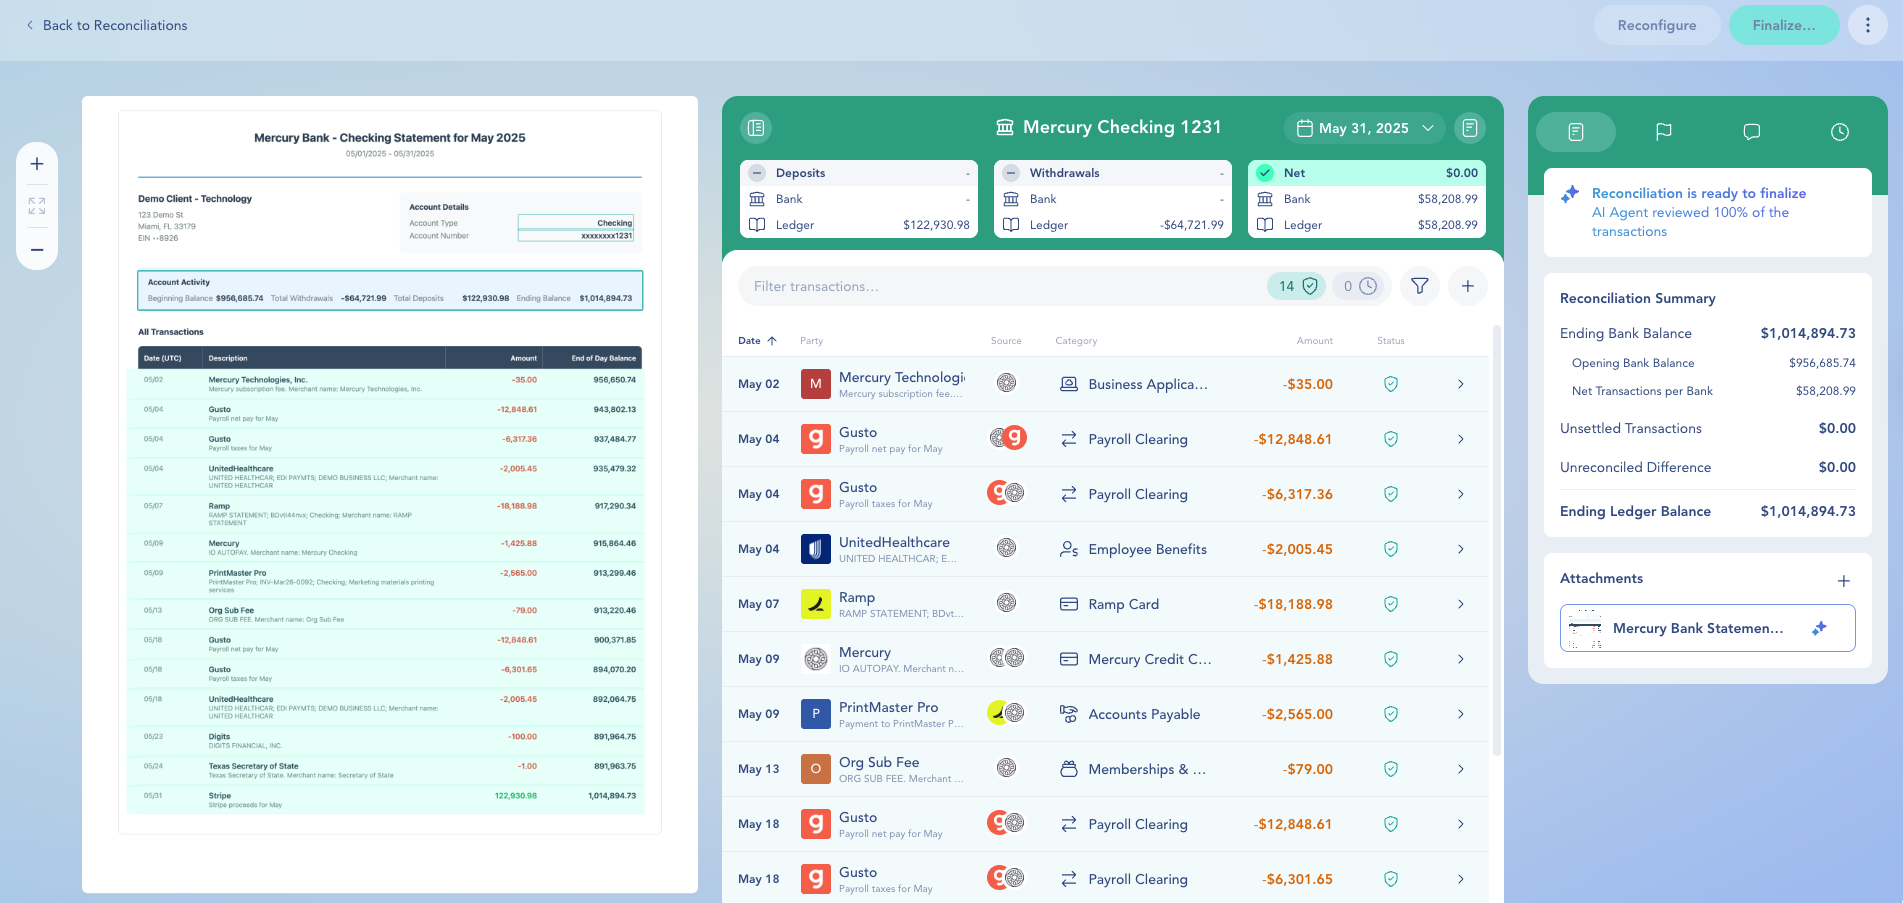
Once you’ve started a reconciliation, you’ll land on a detailed view like the one below:

What You’ll See
All transactions from the last finalized reconciliation up to your selected end date.
Unsettled transactions carried forward from earlier periods.
Available Features
Filters for narrowing results by amount, date, or status.
Checkboxes for bulk or individual reconciliation.
Counts for reconciled and unsettled transactions.
Manual Transaction button to add missing entries.
Status icons show which transactions are complete and which need review.
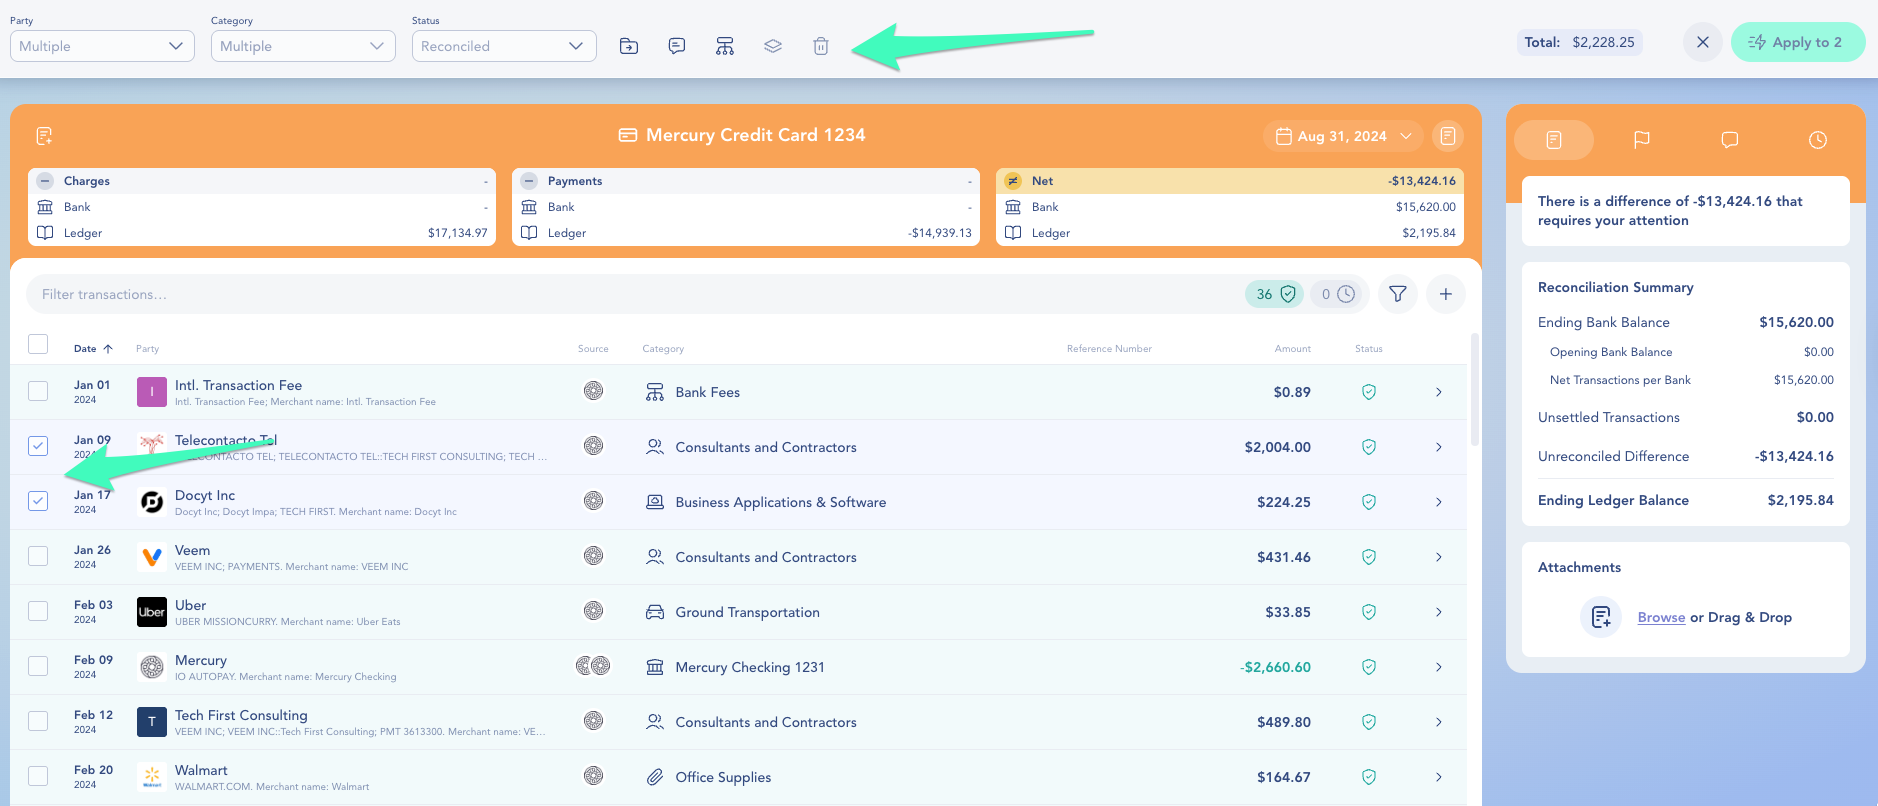
Bulk Editing Transactions
Select the checkboxes next to the transactions you want to update — a bulk actions bar appears.
Choose your changes. You can combine several in one pass:
Party — assign or correct the vendor/customer
Category — recategorize everything selected
Department or Location — tag the selected transactions with a dimension
Status — mark as Reconciled or Unsettled
Comment — post one comment to all selected transactions
Delete — remove the selected transactions

Click Apply — the button shows how many transactions you're updating (e.g., Apply 12). Nothing changes until you click it, and Cancel discards your pending edits.
As you select, a running total of the selected amounts is shown — useful for confirming a reconciliation balances before you make changes.
Finalize, Reconfigure, or Delete
In the top right corner, you have the following options:

Finalize
When all transactions are matched and the balance is correct.
Locks the period to prevent accidental edits.
Reconfigure
If you need to change a draft reconciliation.
Reopens the setup screen to adjust the ending date, ending balance, or deposits/withdrawals. Note: You can’t change the date if it overlaps with another reconciliation for the same category.
Delete
If the reconciliation was started by mistake or needs to be redone.
Removes the reconciliation completely so you can start fresh.
After you finalize all accounts for the month, close the month to lock changes → Closing & Reopening Periods
